Blogger
Description
Blogger is a blog-publishing service that allows multi-user blogs with time-stamped entries. One of the easiest ways to use our services for your blog, hosted on Blogger, is by using our Records Templates. They allow you to create the necessary records in your Master DNS Zone when you decide to use your own domain for your blog in Blogger.
How to add
In your ClouDNS account, you need to create a Master DNS Zone. If you do not know how to do it, you can check it here. When your Master DNS Zone is created, go to your DNS Zone Control Panel and find the "Records Templates" button, located between the "SOA settings" and "Cloud domains" buttons. Click on it.

From the orange boxes, click on "Blogger".
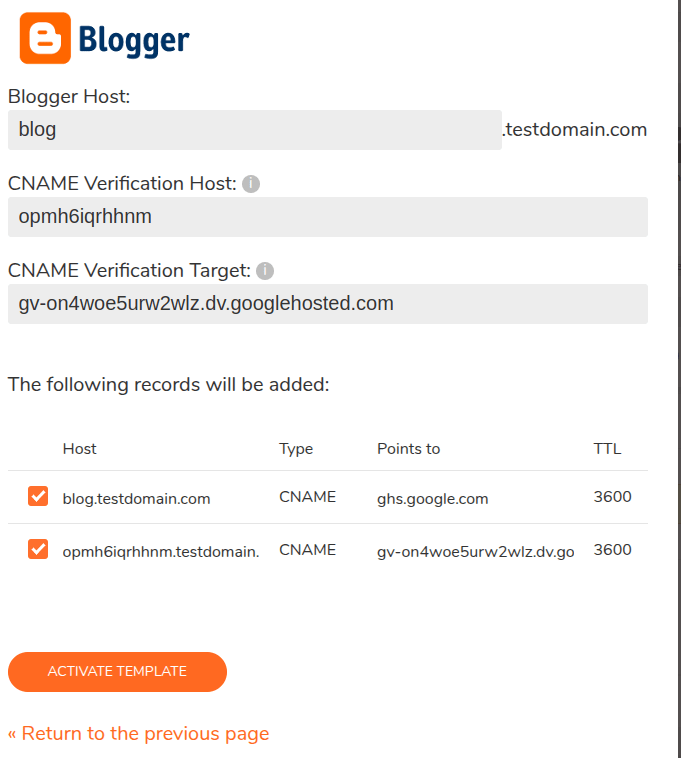
As you can see, the records are ready for creation, but first, you need to find your CNAME Verification Host и CNAME Verification Target.
The custom CNAME record verifies that you are the owner of this blog. To find it, go to your Blogger account. Then, click on "Settings" and find "Publishing". Click on "Custom domain". Enter your domain name. Note that the blogs may not be hosted on root domains (ex: yourdomain.com). You need to add a top-level domain (www.yourdomain.com) or subdomain (blog.yourdomain.com). This is also valid for the "Host" field in our Records Templates.
After that, a screen with the required CNAME records will appear. They are shown in this screenshot.
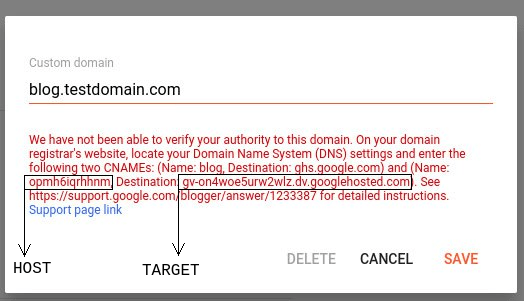
Please note that the above values are just examples. You must copy the values of the second CNAME record and paste them in the white fields of your Blogger Records Template. Then, activate the template by clicking on the orange "Activate template" button.
In Blogger, click on the orange "Save" button.
You are ready! Now, your blog in Blogger has a custom domain.
Last modified: 2025-04-24