Dig command (Domain Information Groper) is one of the most popular DNS testing tools. You can use it to troubleshoot your DNS and make sure everything works fine. You can try it on Linux, Mac OS, and Windows. For this demonstration, we will use a random old laptop with the latest version of Linux Mint (19.1). Linux Mint is based on Ubuntu Linux. Many old laptops can get a new life as a diagnostic tool.
Table of Contents
How does Dig Command work?
Dig Command works the same way as a typical DNS query. Let’s take an A record request. If you want to see the A record, you want to know the IP address of a particular domain. The request will first check if your router has the information of many sites’ addresses in its cache. If it doesn’t have it, the request must be answered from another recursive server. The common solution is that your query will be responded from the recursive servers of your internet provider. It is possible that it doesn’t know it either. No problem, your query will go on a search for the root server. The request will go to the top-level domain like .COM or .EU, and in the end you will get the IP address from the authoritative server for the domain you were checking.
Dig Command Syntax
Understanding the syntax of the dig command is crucial for effectively utilizing it for DNS troubleshooting and queries. The basic syntax of the dig command is as follows:
dig [@server] [name] [query type] [options]
- [@server]: Specifies the DNS server to query. If omitted, dig uses the default server specified in your system’s resolver configuration (usually defined in /etc/resolv.conf).
- [name]: This is the domain name or IP address you want to query. For example, cloudns.net.
- [query type]: This specifies the type of DNS record you are interested in. Common types include A, MX, SOA, TXT, PTR etc. If this is left out, dig defaults to querying the A record.
- [options]: Dig offers a wide range of options to modify its behavior and output. For example, +short displays only the answer section of the query. Other options include +trace for tracing the path of the query across DNS servers, +noall +answer to show only the answer section, and many more.
Experience Industry-Leading DNS Speed with ClouDNS!
Ready for ultra-fast DNS service? Click to register and see the difference!
How to install the dig command on Linux?
First, let’s check if you already have the dig command installed. You can do that by opening the terminal and writing dig -v. If you have it, your computer will show a message similar to this one:
DiG 9.11.3-1ubuntu1.7-Ubuntu.
Many new Linux distros have it pre-installed. In case you don’t have it, you will get the following message:
dig command not found
For Linux Mint, Ubuntu and other Ubuntu-based Linux distributions you can use the following command:
sudo apt install dnsutils
If you are using Fedora or CentOS you should use:
sudo yum install bind-utils
And for Arch Linux users:
sudo pacman -S bind-tools
Understanding the dig command
Let’s start with a simple example to understand it. We will use google.com for the testing. You can try it directly with your domain, by simply replacing google.com with your domain.
dig google.com
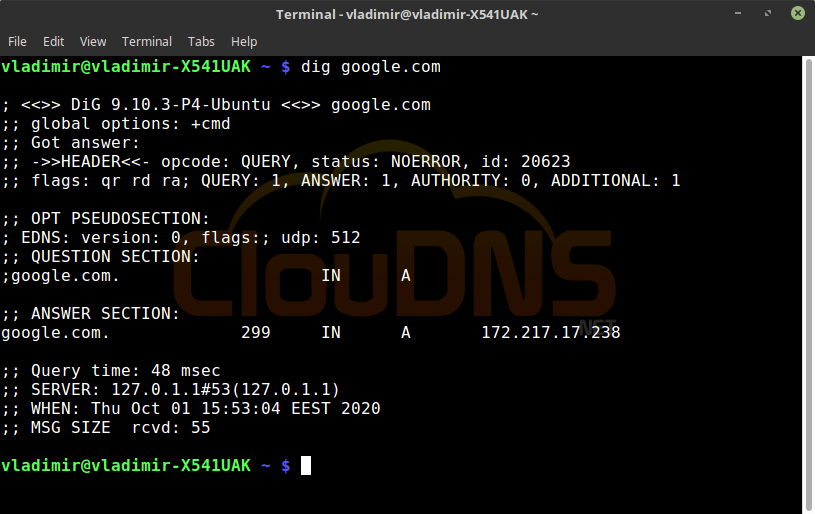
The first line will inform you about the version of the dig command and the second about the global option.
After that, you will get technical information provided by the DNS nameserver. The header shows you what did you do and was it successful. If there is “NOERROR” that there was no problem.
You will see the answer for the EDNS.
Following line shows that by default you are requesting the A record.
You will get the answer for the A record – the correspondent IP address and you will get statistic about the query.
More dig command examples:
dig google.com +short
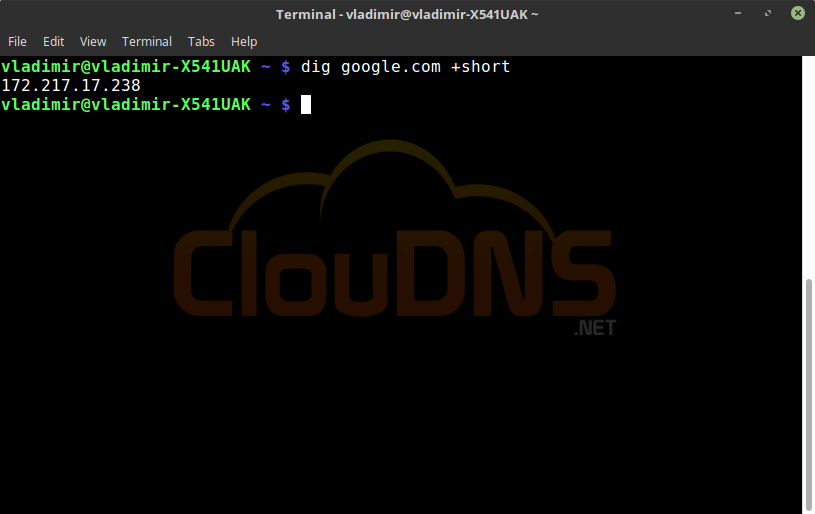
This will show you just the IP address without any additional information. Quick and easy to use the answer that is basically the answer of an A record.
dig google.com MX
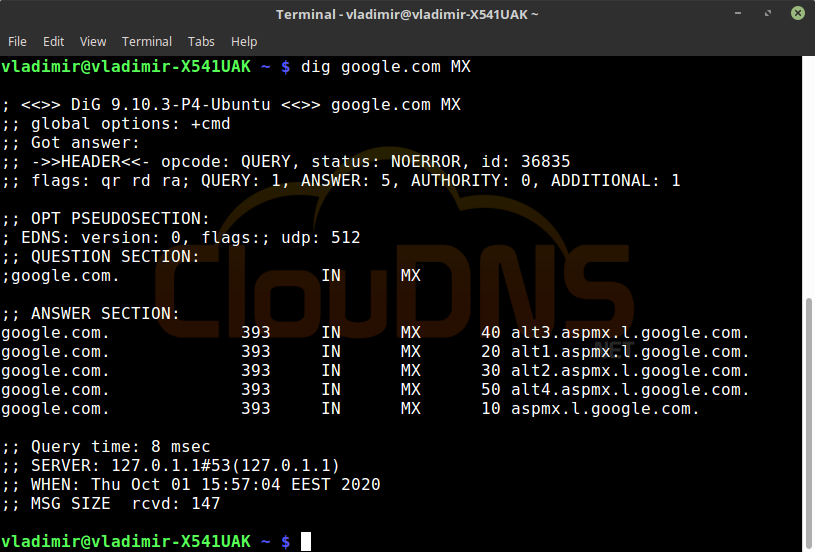
You can query different types of records like the mail exchanger ones. MX records show the responsible mail server for accepting emails. You can see if all of the servers are working the right way and if they are responding too slowly.
dig google.com SOA
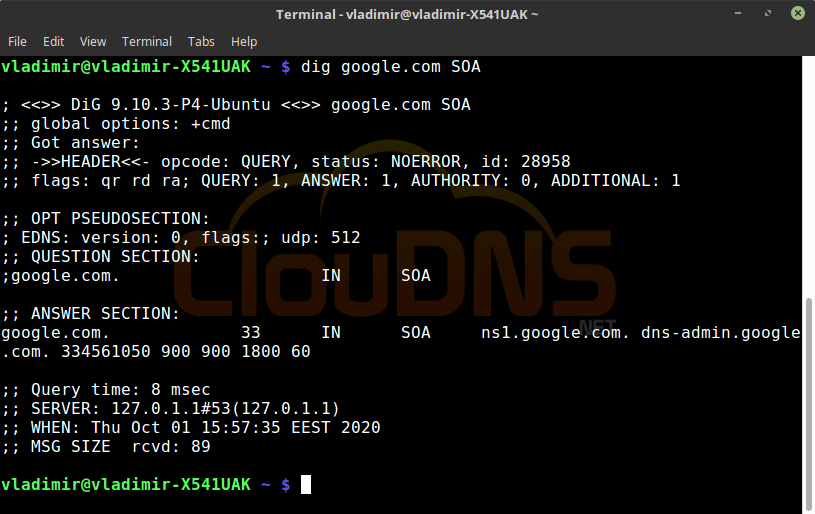
SOA – the start of authority, shows the authoritative DNS server. In this record, you see valuable information about the zone. There is only one SOA per zone.
dig google.com TTL
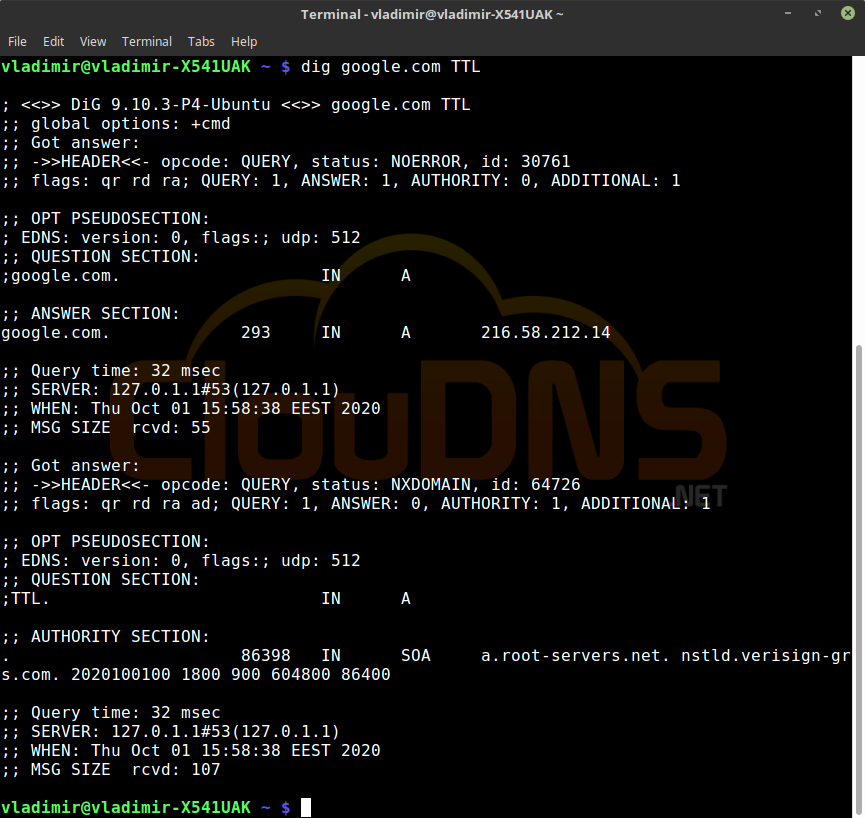
TTL – time to live. It shows how long the data should be kept. You can read more about TTL HERE. People usually leave longer TTL, and that way, they lower the DNS servers’ load. When you are creating records, you can set it to a low value, if you like. Also, it is possible to set different TTL for different DNS records.
dig google.com +nocomments +noquestion +noauthority +noadditional +nostats
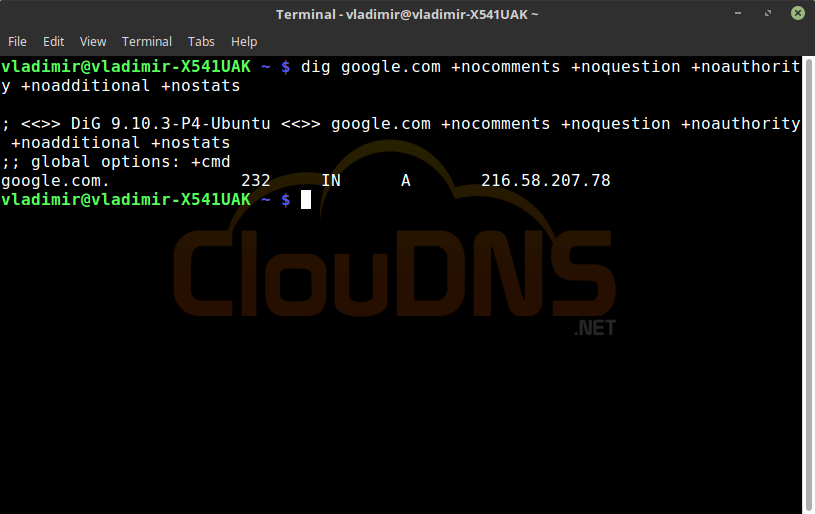
Only answer query. Use it if you don’t want to receive extra information. A clear and short answer that will evade the extra statistics that you might want to skip.
dig google.com ANY +noall +answer
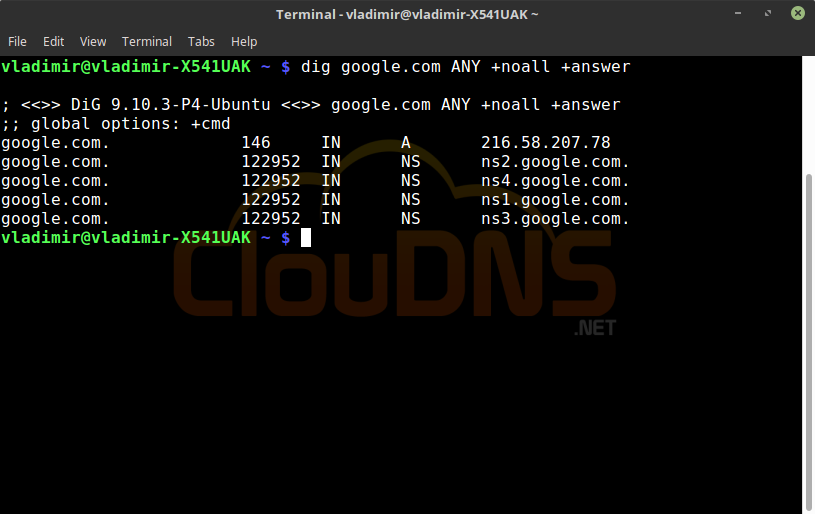
Query all types of DNS records. It will show all the different types of DNS records. This will give you an overview of the domain. Later you can use the dig command for the exact DNS records that you want.
dig -x 172.217.1.142
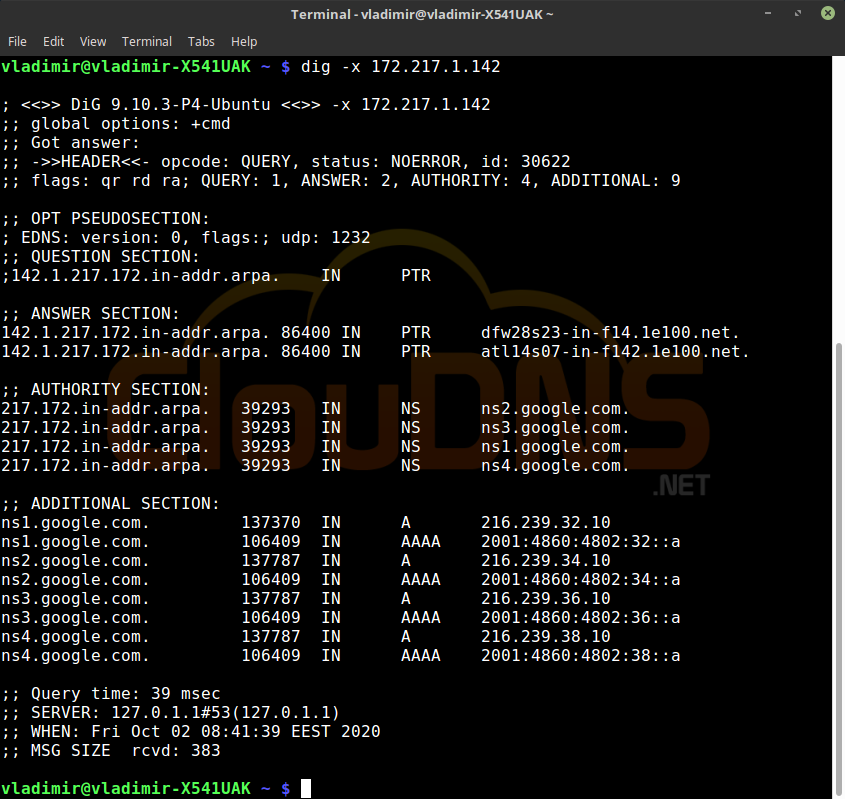
Reverse DNS lookup. You can also do the opposite and check the IP address. The rDNS is used for verification. The result will be a PTR record that verifies the nameserver. It is needed that a PTR record exists. Otherwise, this revers checking can’t give an answer.
dig @8.8.8.8 +trace google.com
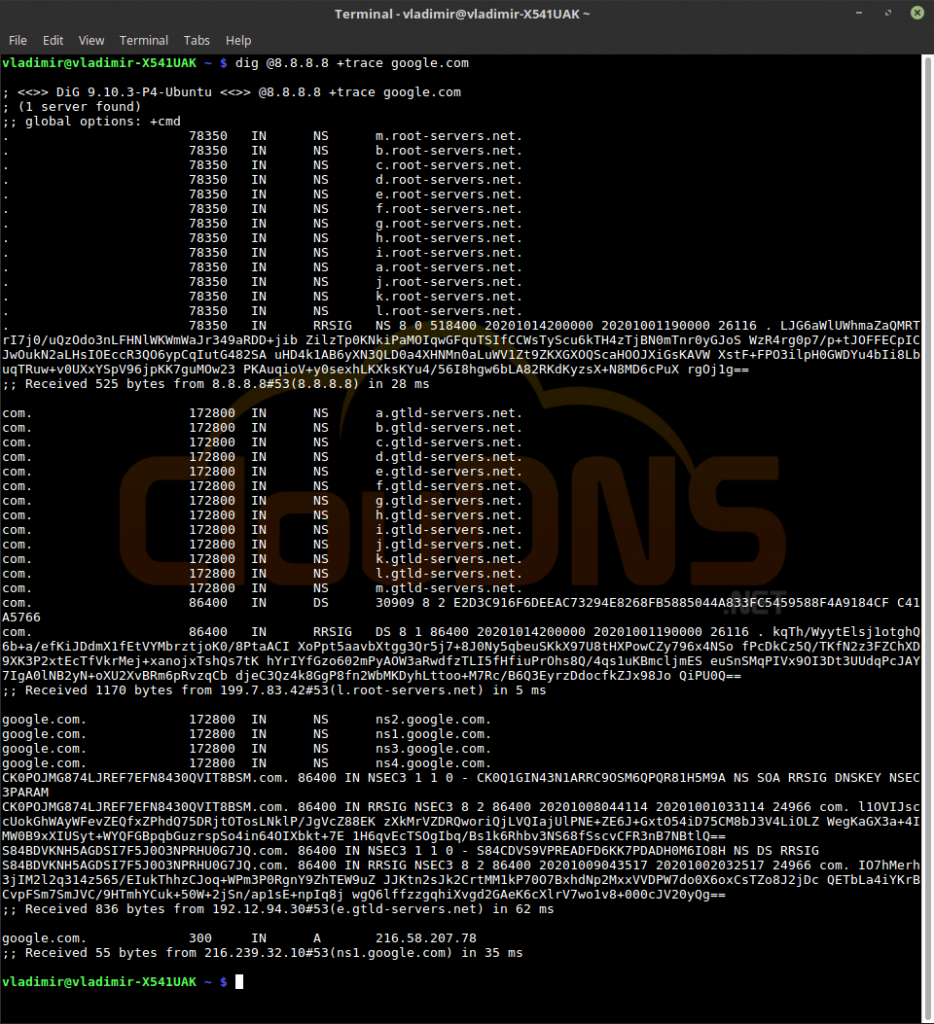
Trace DNS Path. It will show the whole route that a DNS query takes. Every hop from a server to server. It can show you where exactly server is not working. You might be surprised how far does your query travels. Check it from different locations, and you might see where in the world you need a new point of presence to reduce the latency for the users there.
11 dig -p 5300 google.com
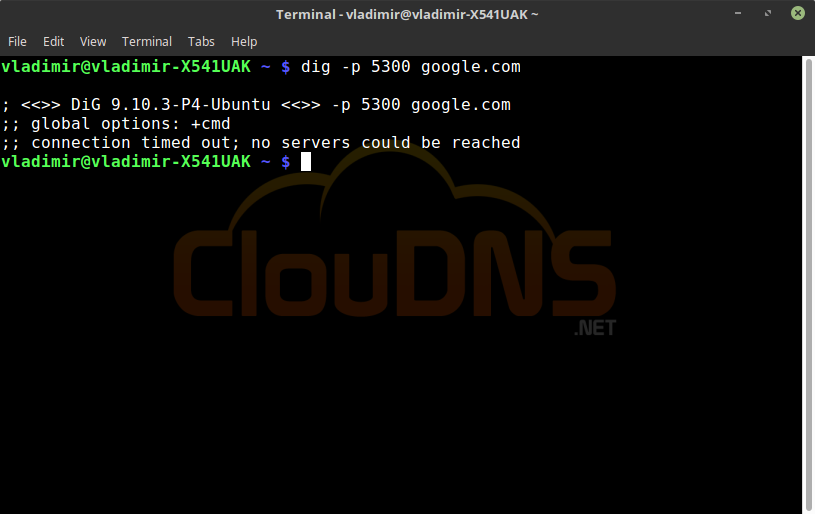
Specify Port Number. If you have changed the standard port 53 to another for increased security, you can make a dig command to check if it is working correctly. And of course, you can check if you have closed the standard ports, and you don’t have any “open doors” for attackers.
dig _sip._udp.YOURDOMAIN.com SRV
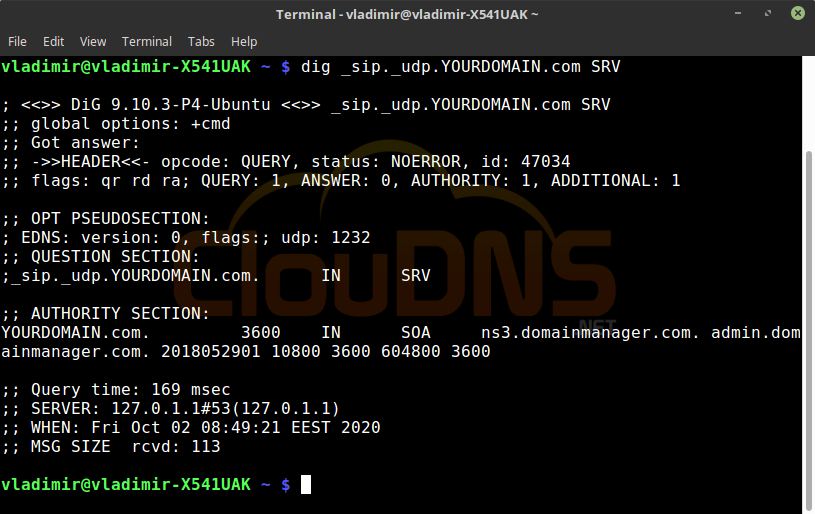
Another record that you can check with this command is the SRV. The SRV records are often used in VoIP. In this example, we are checking the SIP service, and we will use the UDP protocol. The answer will show you the time for response and the server’s IP responsible for the SIP service.
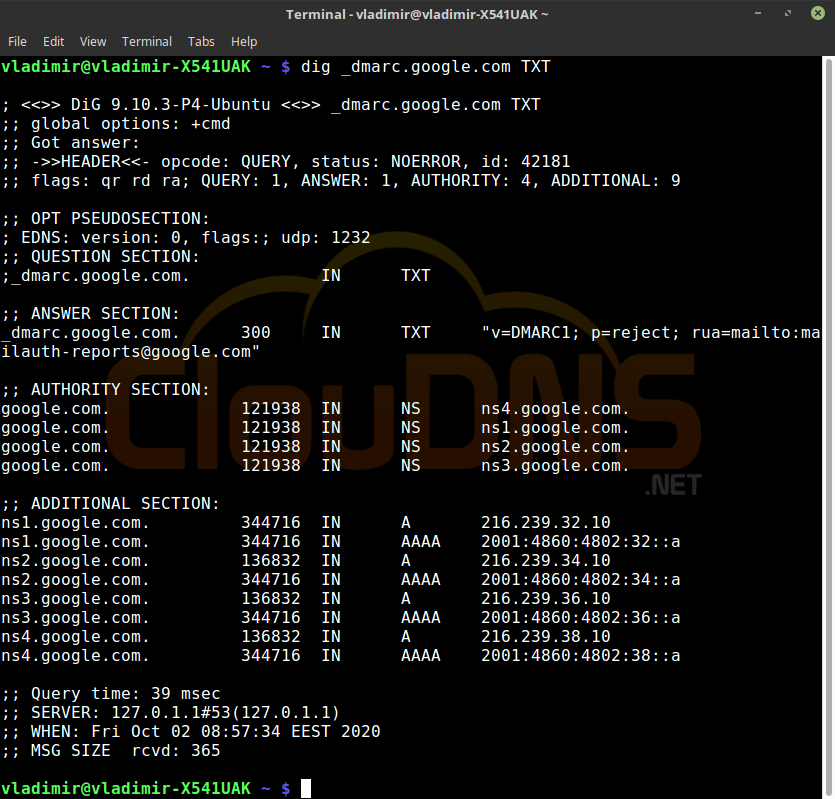
dig google.com TXT
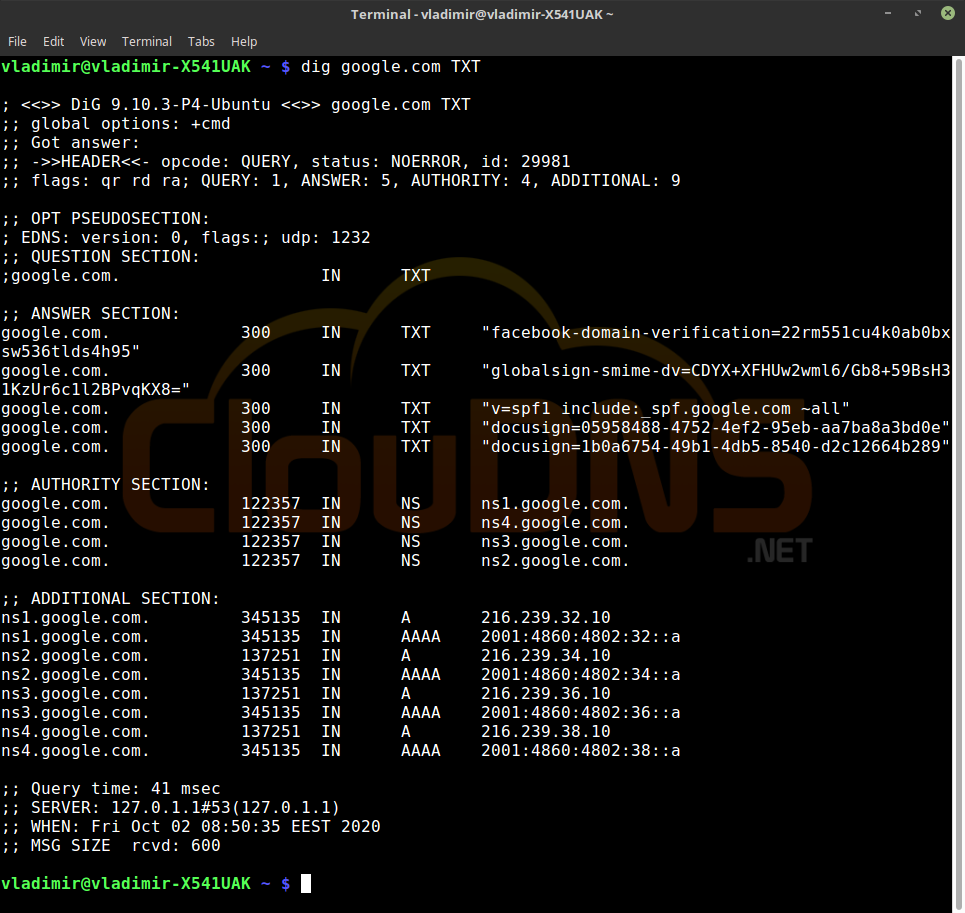
To see all of the TXT records, use this command. TXT records can be used for verifications and can have different variations. For example, it can be a DMARC record. To see a particular one, you can use the following command and change the “dmarc” with the one you need.
dig _dmarc.google.com TXT
Now you know the basics of the dig command on Linux. You can start experimenting by yourself.
We can recommend you a few more tools that can be useful for your DNS diagnostic Nslookup, Traceroute, MTR, Host, and Ping.
How to Export Dig Command Results to a File
Exporting dig command results to a file is a simple yet powerful way to document DNS troubleshooting or share findings with your team. You can achieve this by redirecting the output of the dig command to a file using the > or >> operators in the terminal.
For example, to save the results of a query for google.com into a file called output.txt, use the following syntax:
dig google.com > output.txt
This command will create the file output.txt in the current directory and store the output of the dig query inside it. If the file already exists, it will be overwritten. To append the results to an existing file without overwriting it, use the >> operator:
dig google.com >> output.txt
For more structured output, you can use options like +short to save only the essential information:
dig google.com +short > output.txt
This is especially useful for scripting and automation, as it simplifies the output.
Whether you’re saving query results for documentation, debugging, or analysis, exporting dig output is a versatile technique for managing DNS data efficiently.
Conclusion
The dig command is an indispensable tool for DNS troubleshooting and analysis. Its flexibility and powerful options make it a preferred choice for network administrators and IT professionals. By understanding how to install and use the dig command, as well as mastering its syntax, you can efficiently diagnose and solve DNS-related issues. Whether you’re checking DNS records, performing reverse DNS lookups, or tracing the path of DNS queries, dig provides you with the insights needed to ensure your domain’s DNS is functioning correctly. Remember, practice is key to becoming proficient with the dig command, so don’t hesitate to experiment with different queries and options. With this knowledge, you’re well-equipped to tackle any DNS challenges that come your way.